Example theme
Last updated: · Published:
Prerequisites
For creating the following example theme you need to have the Plate Themetool up and running and have created a public theme.
- Install the Plate Themetool()
- Create a public theme()
Here we are going to create a simple theme. First we need the initial theme file actually called theme.plate. This contains the basic HTML tags like html, head and body. By using Liquid include tags we can enrich our theme. In the following example we have a hardcoded footer. We will update this to use a Plate tray content type.
<!DOCTYPE html>
<html>
<head>
    {% include "content_for_head" %}
    {% comment %}{% include "layouts/head/root_properties" %}{% endcomment %}
    <meta name="theme-color" content="Canvas">
    <meta name="color-scheme" content="light dark">

    {{ "styles/main.css" | asset_url | stylesheet_tag }}
</head>
{%- capture bodyClasses -%}
    {{ post.content_type.name }}
    {% if post.is_index == true %}is-index{% endif %}
    {% if post.is_homepage %}is-homepage{% endif %}
{%- endcapture -%}
<body id="body"
      class="{{ bodyClasses | strip_newlines }}"
      data-content-editor="{{ request.inline_cms_active }}">
    {{ content_for_layout }}

    <footer>
        <p>Hardcode footer – Rick</p>
    </footer>

    <div id="edit_app">
        <h6>This area will be use for a Vue app.</h6>
    </div>
    {% include 'includes/svg/svg' %}

    {{ "scripts/index.js" | asset_url | script_tag }}
</body>
</html>
Create a Footer Tray
Navigate to Content Types > Trays (tab):
Add a new tray and title and name, whereas the title is what the user sees and the machine name is what we need to properly render the Tray inside Liquid.

After creating the footer tray we can include it in our template. We replace the hardcoded footer tags with a Tray include.
{% comment %}
    Hardcoded footer.
{% endcomment %}
<footer>
    {% comment %}TODO: Make a tray out of this. {% endcomment %}
    <p>Hardcoded footer</p>
</footer>

{% comment %}
    Here we use the special 'tray' include. Where 'footer' points to the footer tray content model.
{% endcomment %}
{% tray "footer" %}
The {% tray "footer" %} points to a specific location in the theme directory namely:theme/trays/footer.plate
In this file the following tags are required in order to give it the Plate Editable content editor.
{% comment %}
    The 'content_for' <machinename> is required. This links this code the tray content model.
{% endcomment %}
{% content_for footer %}
<footer class="footer">
    {% comment %}
        The 'render_content' tag is required for rendering the content editor.
    {% endcomment %}
    {% render_content %}
</footer>
{% endcontent_for %}
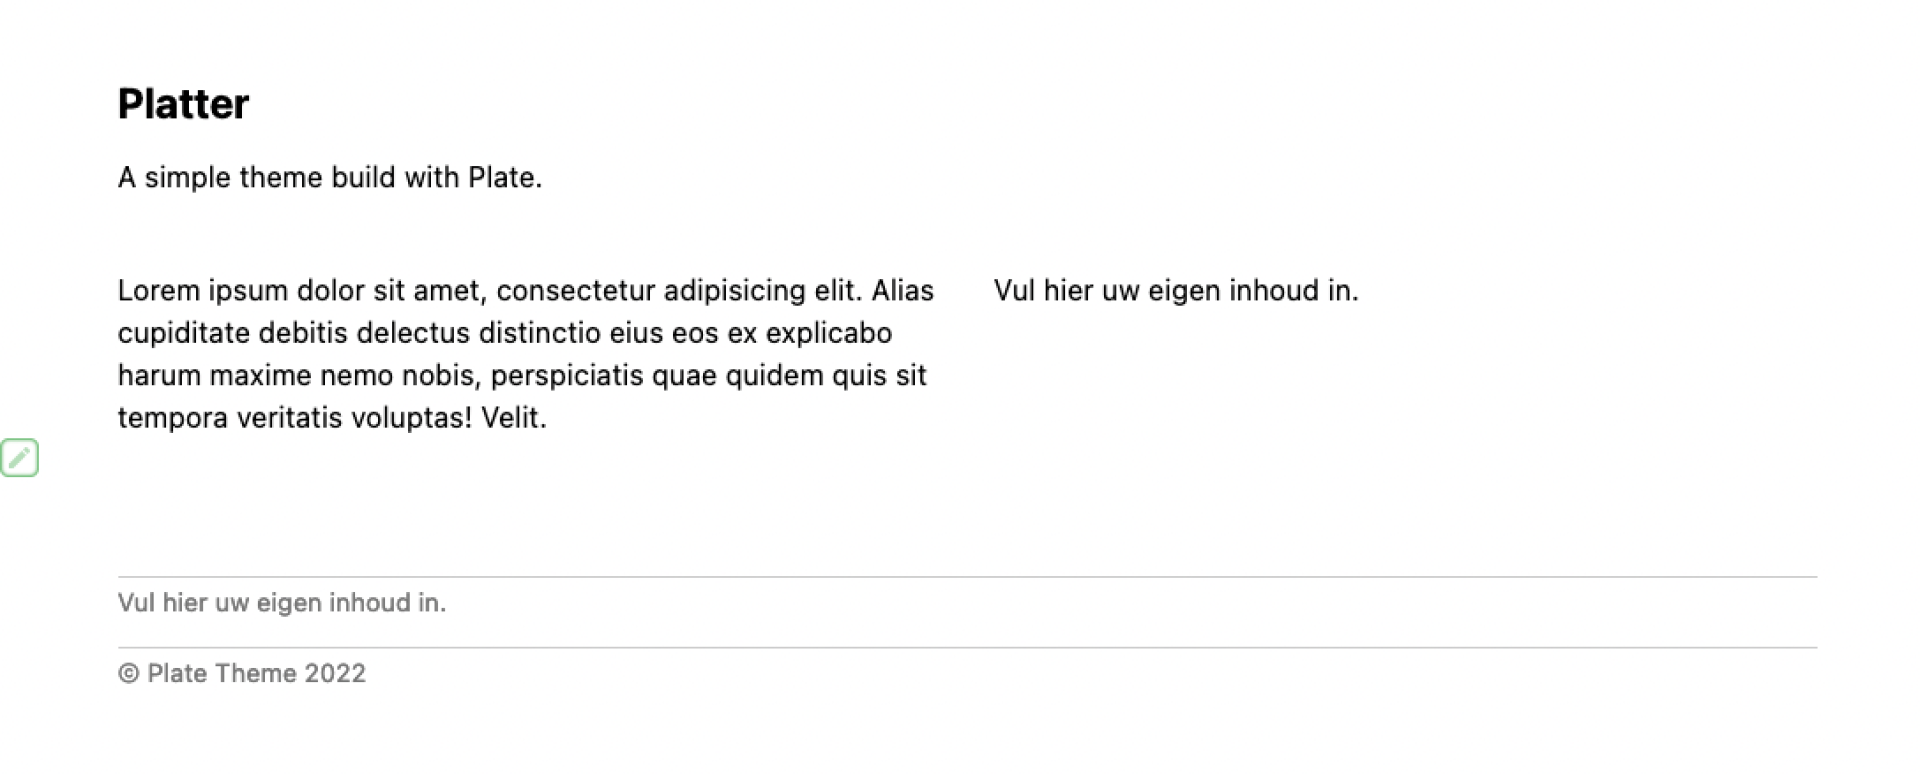
When the theme files are updated we can now see our code in action. Beneath each page we now have a footer. This is one of the reasons to use a Plate Tray, since this content type is the same everywhere. So if we change content inside the footer on page x, it is also changed on page y.
Thanks to the render_content we now have an editable footer.


Adding a field
For now our footer is not finished, we would like to add a special text line containing copyright.
Back in the dashboard we go to Content Types > Trays > Footer
Here we add a field by clicking the big plus. Add a simple text field. This creates a one line input form where text can entered.


Now that we defined a new field to be used on the footer tray we can render it conditionally.
{% content_for footer %}
<footer class="footer">
    {% render_content %}

    {% if footer.copyright != blank %}
        <div class="footer-bottom">
            <p>{{ footer.copyright }}</p>
        </div>
    {% endif %}
</footer>
{% endcontent_for %}
Currently we are rendering the text but it's not currently aligned with Plate row and column width. We can align the copyright by rendering the proper bootstrap tags for this.
{% if footer.copyright != blank %}
    <div class="footer-bottom">

        <div class="plate--container">
            <div class="plate--row">
                <div class="plate--column">
                    <p>{{ footer.copyright }}</p>
                </div>
            </div>
        </div>

    </div>
{% endif %}
Right now we have a footer with copyright that is always below the editable content area of the footer.
Creating a button in Plate
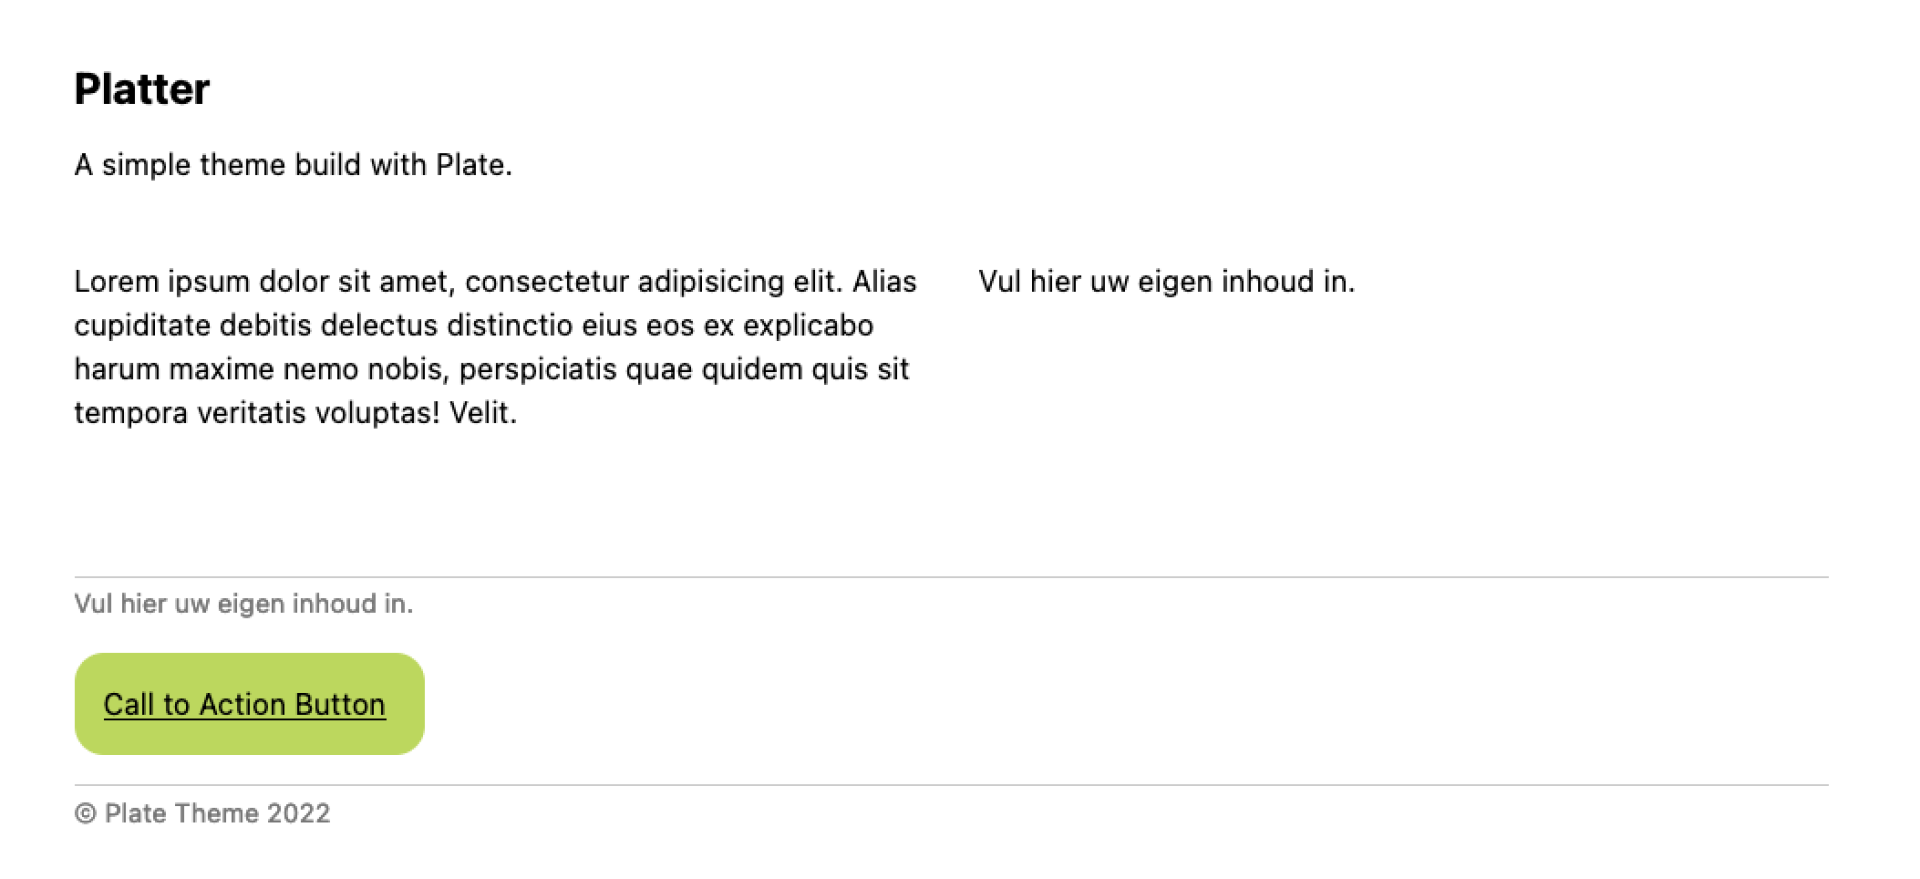
Our footer is not yet complete, we want to add a call to action button inside the footer that links to our contact page. For this we will add a button element. An element in Plate can be placed everywhere inside the content editor areas.
Navigate to Content Types and add a new content type (big plus).
Create a new element, important here is to know that the singular name is the name of the element. The plural name corresponds with the location inside the theme directory.
Consider the following example:

After creating the content model for a Button add 2 fields:
- Text (link text)
- Link field (URL)
We can now render these inside a template file. Elements reside in the elements directory inside a theme.
Create a new file: elements/buttons/button.plate
{% comment %}
    You could also use {{ element.link }} and {{ element.text }}. But I prefer using the named ones as it makes searching the codebase a bit easier.
{% endcomment %}
<a href="{{ button.link }}" class="button">{{ button.text }}</a>
We can now easily use the new Button element inside the footer. Hover over the footer to activate the Plate Editor buttons and add a new element. (red pencil button)
Choose the new button element. (Make sure the theme files are synced and the file name corresponds with the singular and plural name).

Conclusion
With these steps we've created a simple theme which includes a footer and a button element.
There are more things to learn:
- Creating Post types (Content Type with url/paths)
- Sections
- Generic Content Types (E.g.: for creating tags)